
A lot is made of rolling blunts but once you do it a few times, the realise how simple the process is and you’ll wonder what the fuss was about. Without further ado, let’s take a step-by-step guide on how to roll a blunt.
Step 1 – Lick the blunt until moist before then cutting a line from tip to butt. Then, pull the insides out using your thumb whilst being careful not to tear the wrap.
Step 2 – Although this isn’t completely necessary, you can cut the rounded end otherwise the blunt might roll shut too early.
Step 3 – You should now have a rectangular wrap, now lick the edges and seal any small tears that may have been caused. Fold it in the middle just as you would with a joint.
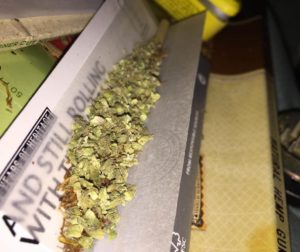
Step 4 – Now it’s time to add the weed and spread it completely down the full length. If you don’t use enough, it will just collapse when you attempt to smoke.
Step 5 – Start to shape it by rolling upward; make sure the weed is tucked by the shorter side. Don’t pinch the ends shut.
Step 6 – Lick what’s left over and seal it shut. Then, run your lighter up and down to ‘bake’ the blunt. You should notice it darkening slightly.
Step 7 – Light the tip evenly and all around and smoke.